How to Do an AI Photoshoot: One Ordinary Selfie, 15 Usable Shots
Booking a studio session for headshots eats a week: schedule it, get made up, commute, wait for retouching. This time I skipped all of that. I took the most ordinary phone selfie I could find, ran an AI photoshoot on ZOOOP, and came out with 15 shots I'd actually use — corporate headshot, birthday, travel, and a cafe lifestyle set.
Here's the whole process, including the parts that went wrong.
Why the studio is now optional
I couldn't have written this a year ago. Back then, changing someone's shirt changed their face. The same person across three frames looked like triplets, and no one was putting that on a résumé.
What changed is identity. Hand the model a reference photo and it now holds your bone structure and skin texture through a change of clothes, a change of light, a change of city. Identity consistency was always the hard part of AI portrait work, and clearing it is what moved an AI photoshoot from toy to tool. A studio sells you lighting and a location — which happen to be the two things a model simulates best.
Photographers still own what they always owned: reading the room, catching an expression you didn't know you had, and any photo that has to document something that really happened. This isn't an argument that an AI photoshoot replaces photography. It's an argument about which shoots you no longer need to book.
Your starting shot: one plain selfie is enough
This is what I started from, untouched:
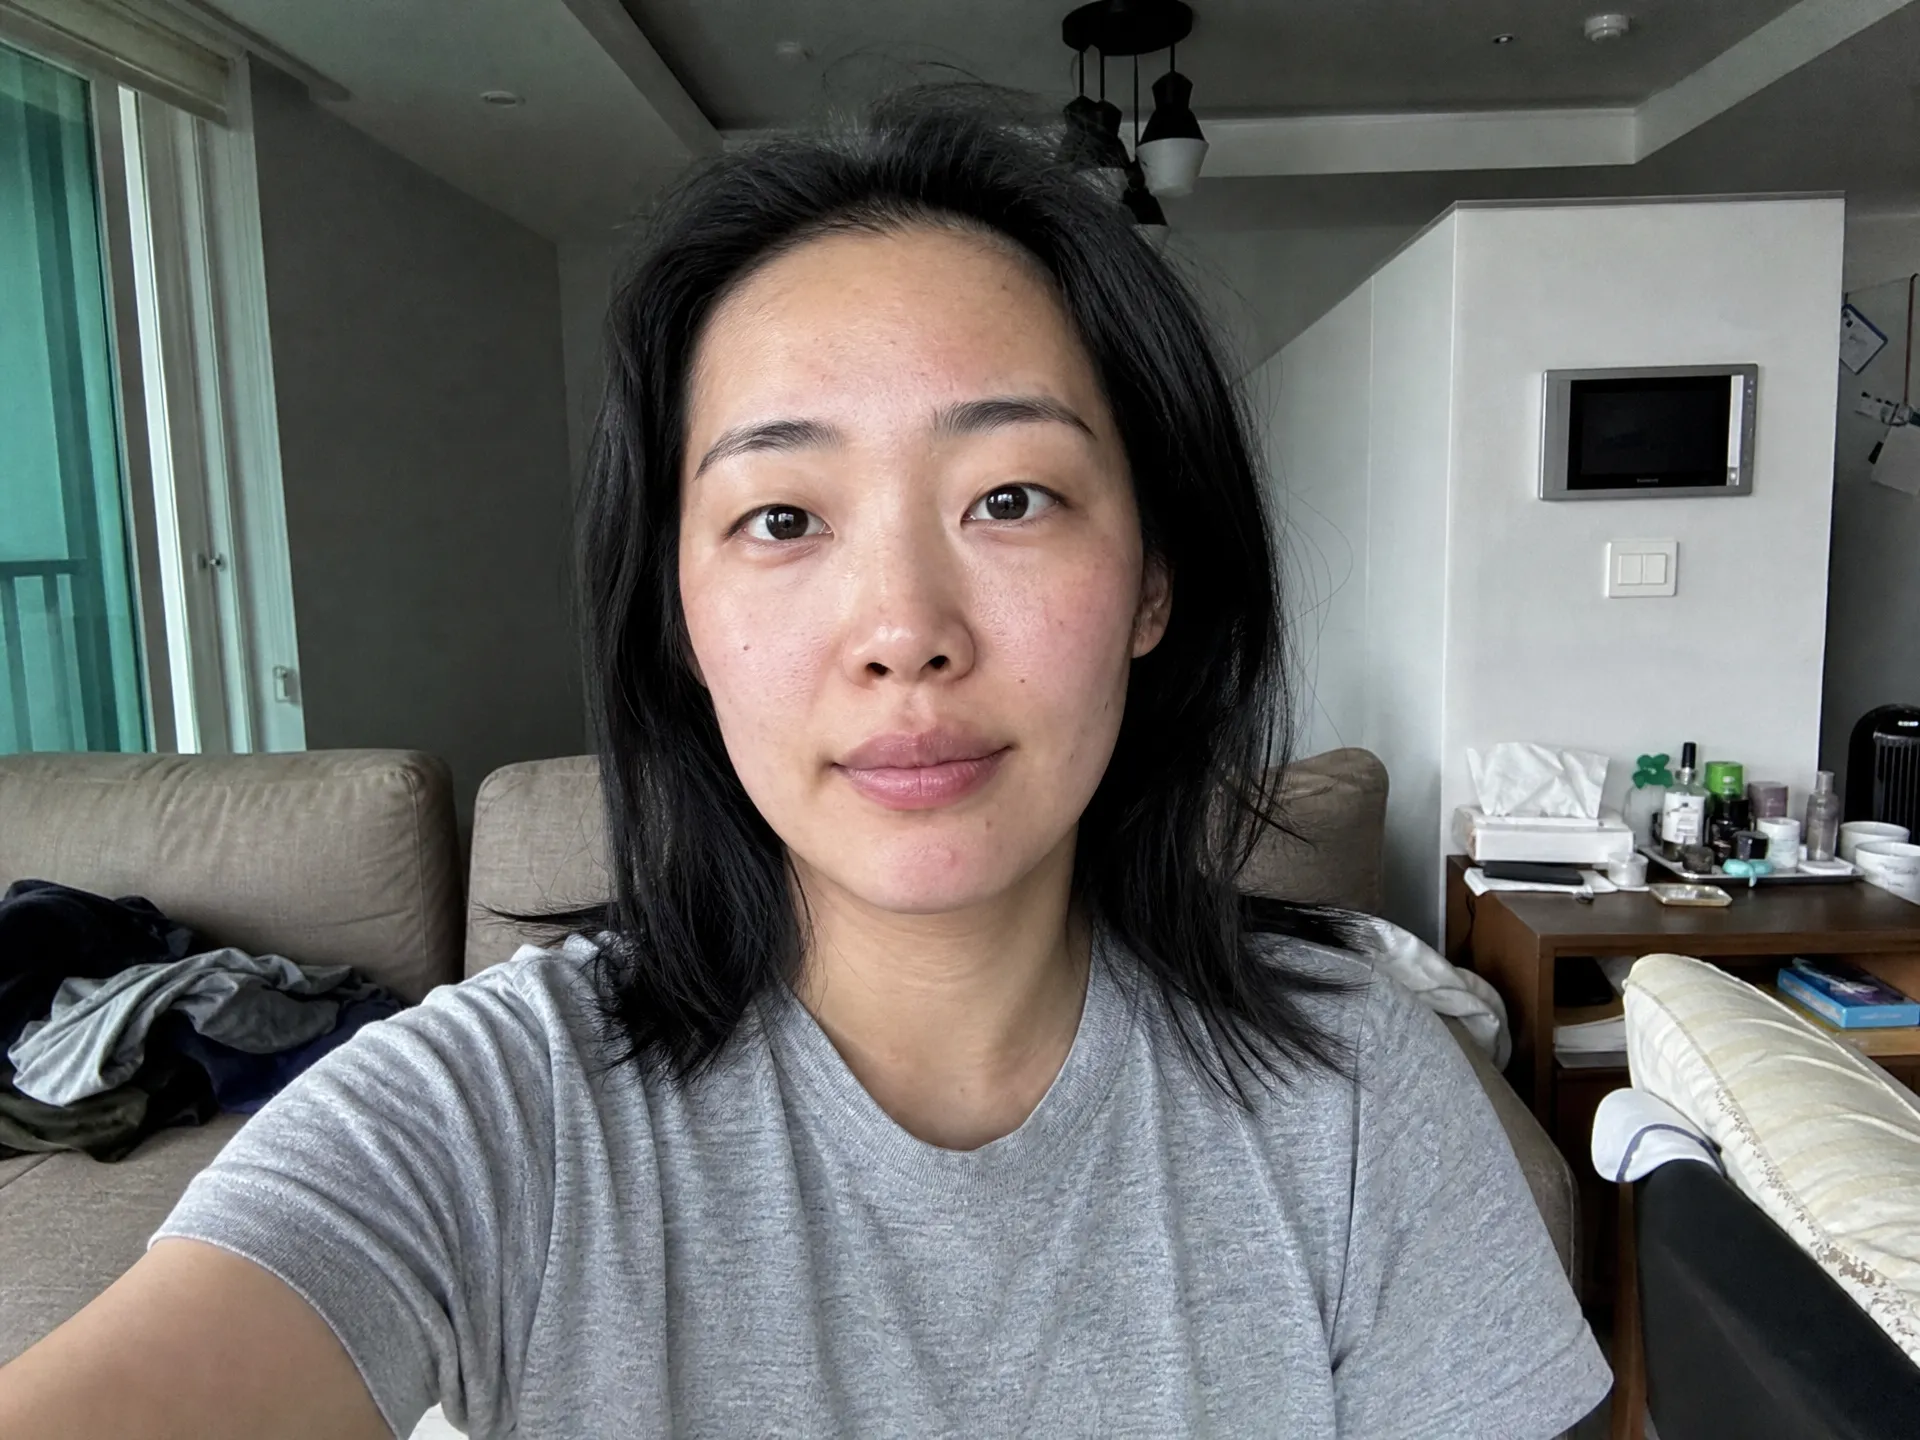
Bad light, careless framing, pores and blemishes intact — which makes it good input. The worst starting point for AI portrait work is a photo that's already been smoothed and beautified: the model reads the filter as your actual skin, and every frame afterwards carries a faint plastic sheen.
There are only three real requirements: the face is frontal or close to it, the features aren't hidden behind hair or glasses, and the resolution isn't tiny. Meet those and a casual phone shot is fine. The cases that genuinely need a reshoot are rare — hard profile angles, backlighting that leaves a silhouette, or a face sitting entirely in shadow.
If you want extra insurance, feed in two or three shots from different angles. More references, less drift in how the model reads your face.
Outfits, hair, makeup: three passes, one face
Outfits first. Using that selfie as the reference, I asked for three looks under the same grey backdrop and the same key light: white shirt, oatmeal knit, charcoal trench.
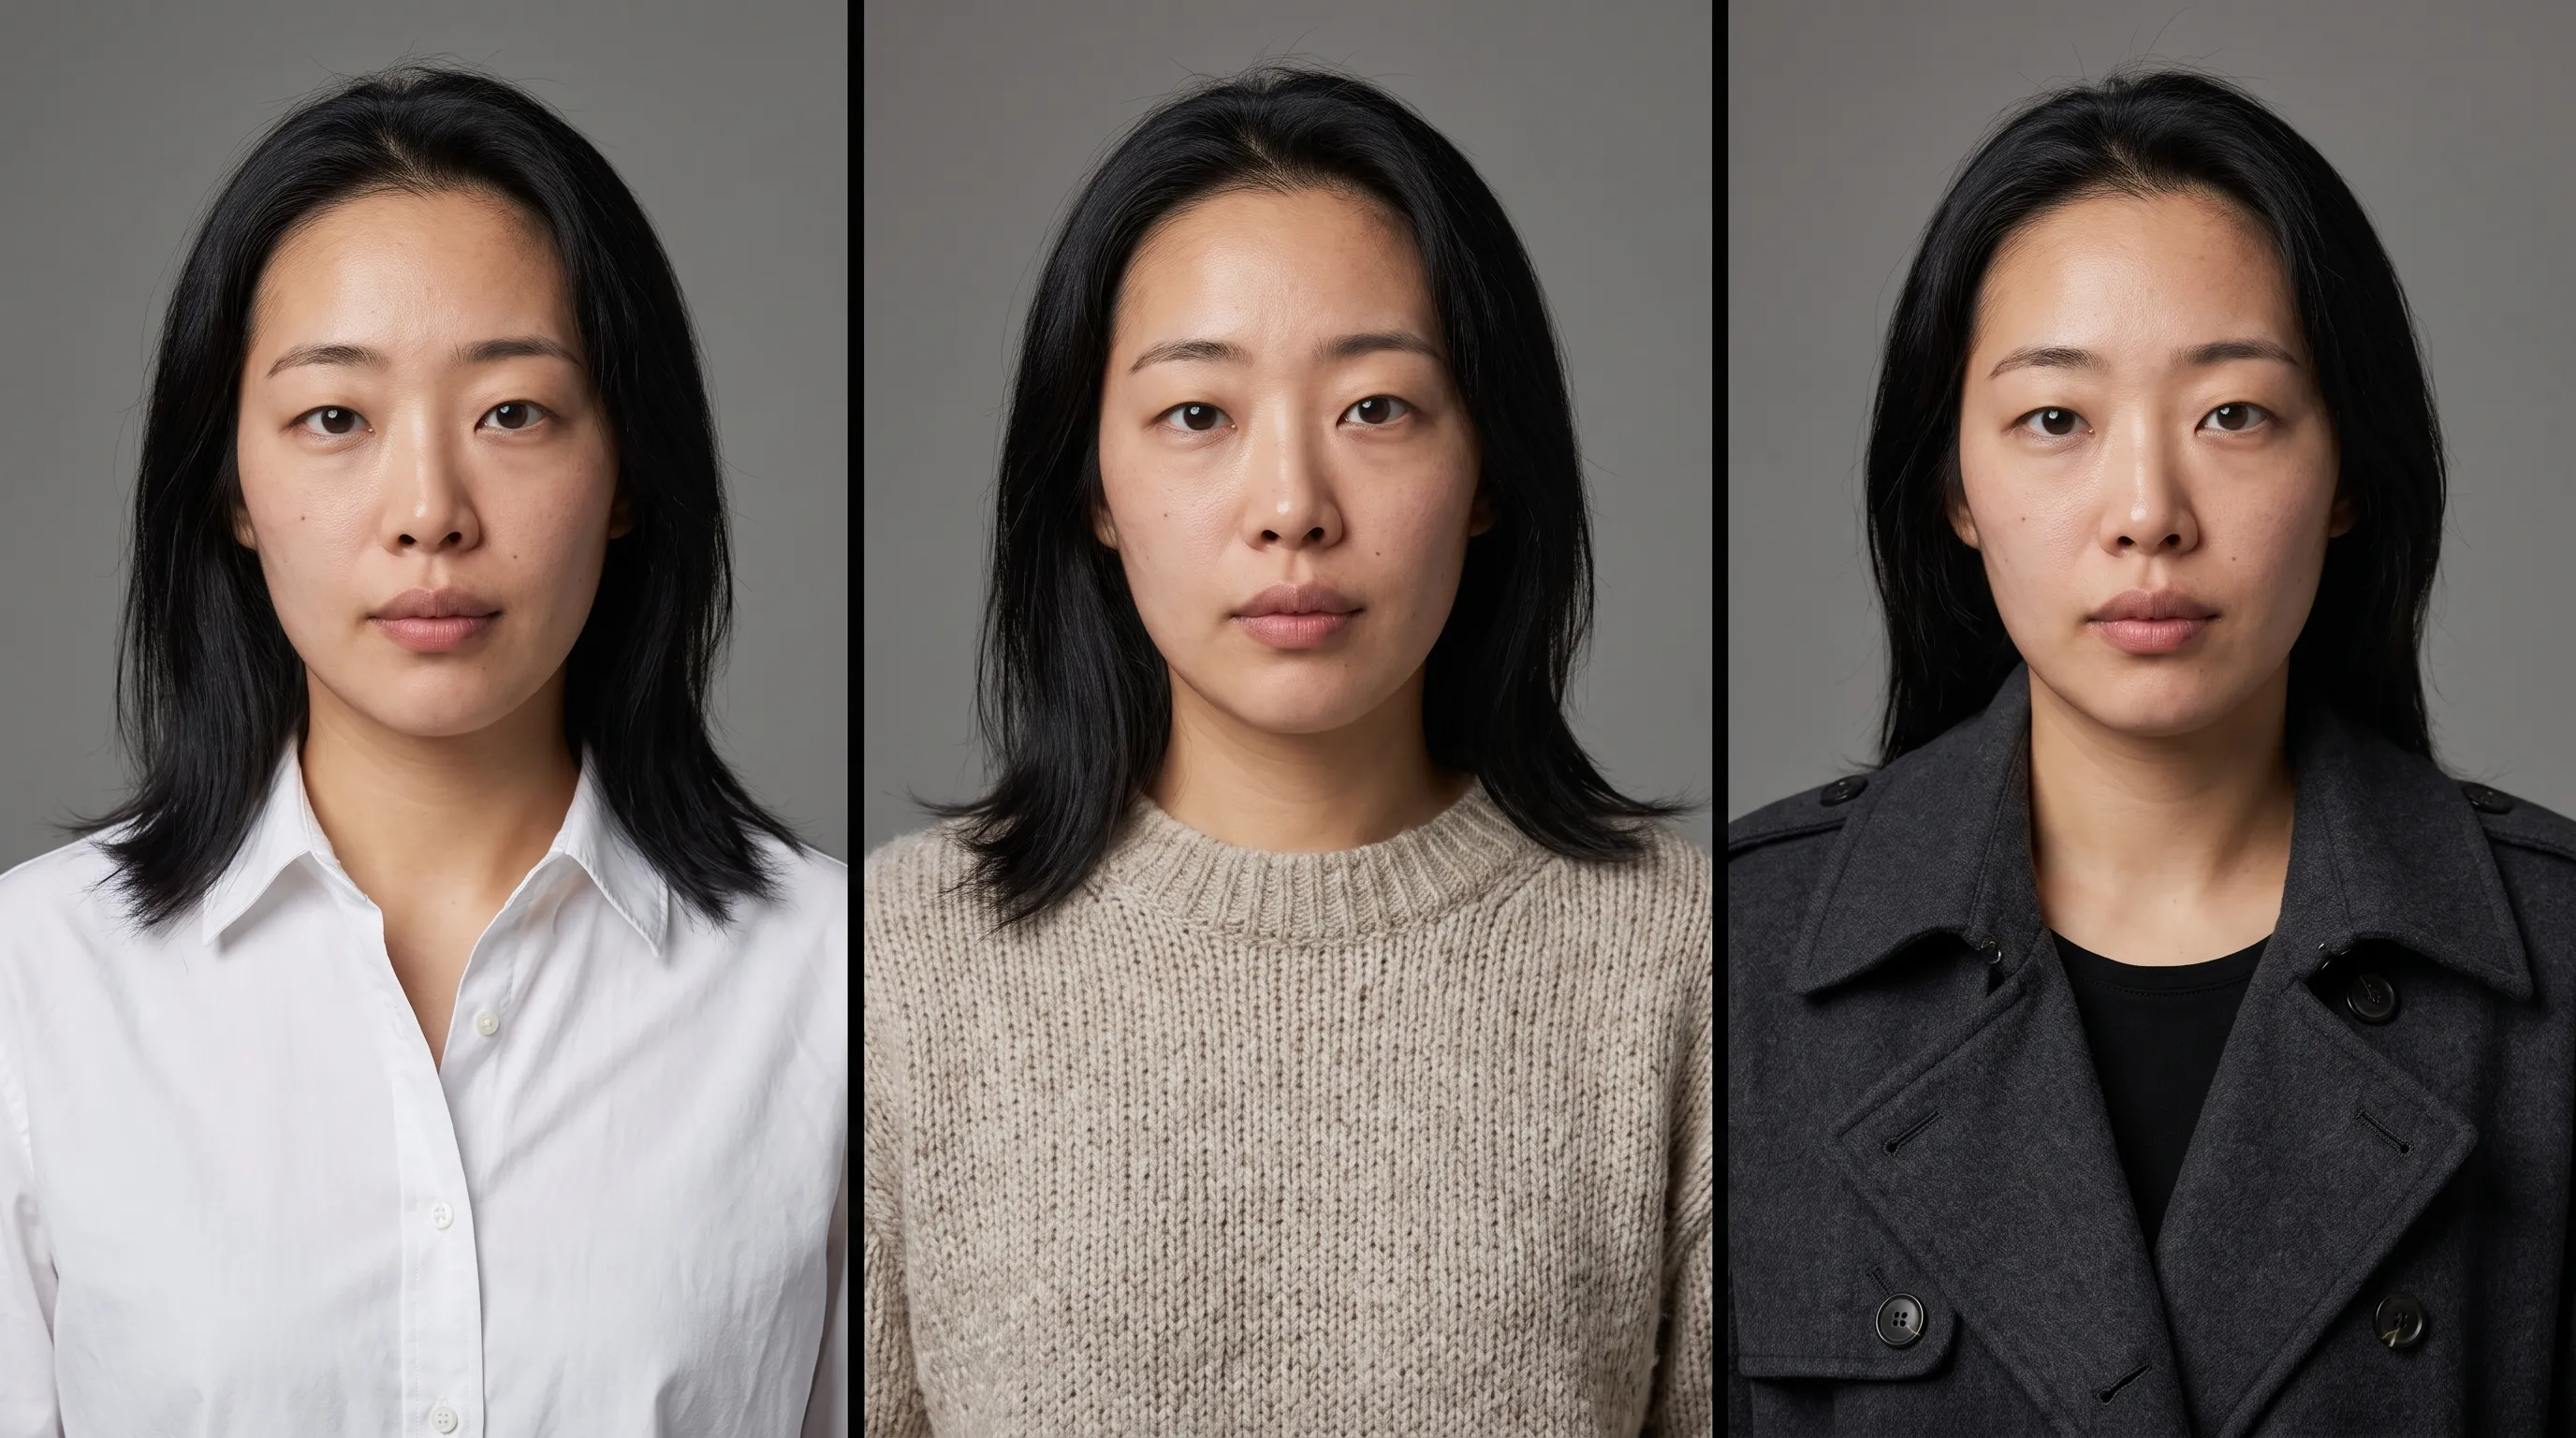
The only thing worth checking here is whether it's still the same face. Fabric folds and material accuracy are secondary — in AI portrait work, if the face drifts, nothing downstream saves it.
Hair and makeup next, from bare to bolder:
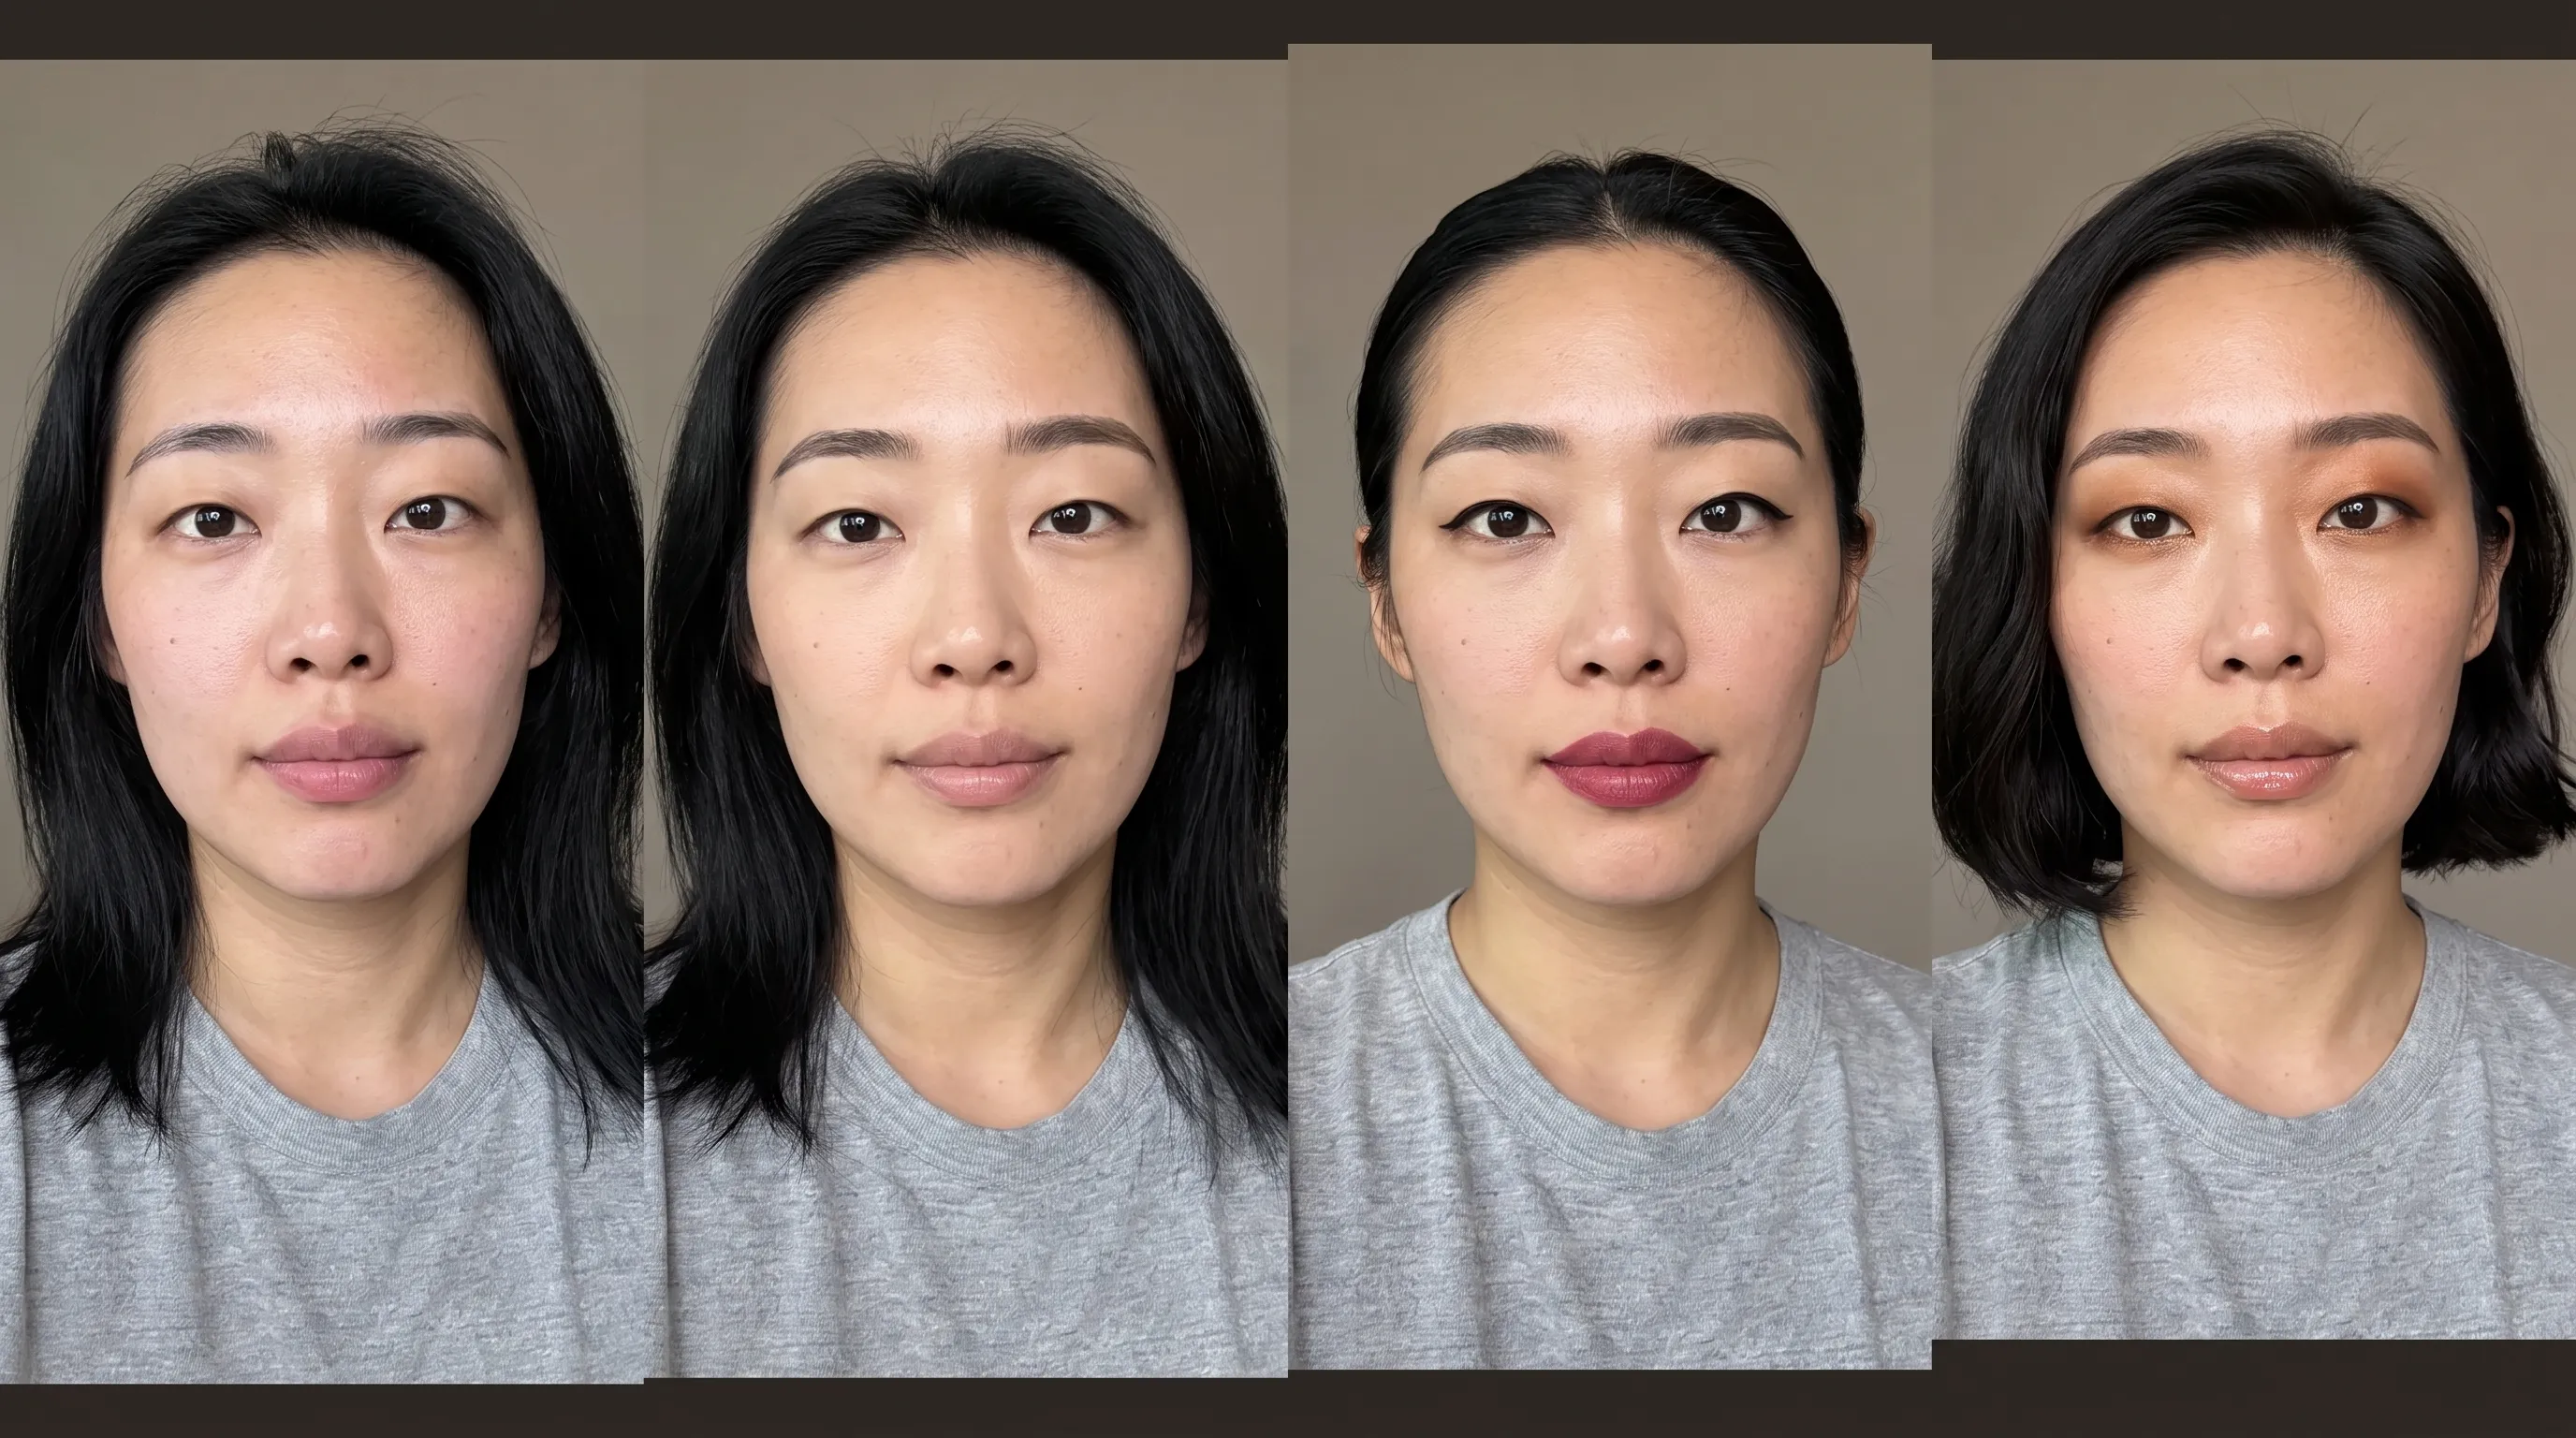
Here's where I tripped. My first attempt put "change the hair" and "change the location" in one prompt, and the model split the difference — the hair landed, the face wandered. Splitting it into two passes fixed it immediately. That's the single most useful thing I learned: change one variable at a time.
When running this batch through AI image generation, I hard-wrote three things into every prompt: same person, same camera position, same light. Everything after that describes the one thing I'm changing.
Locations: the same face in different cities and light
Locations are the best-value step in an AI photoshoot. Shooting these three for real means three places and three waits for the right light.
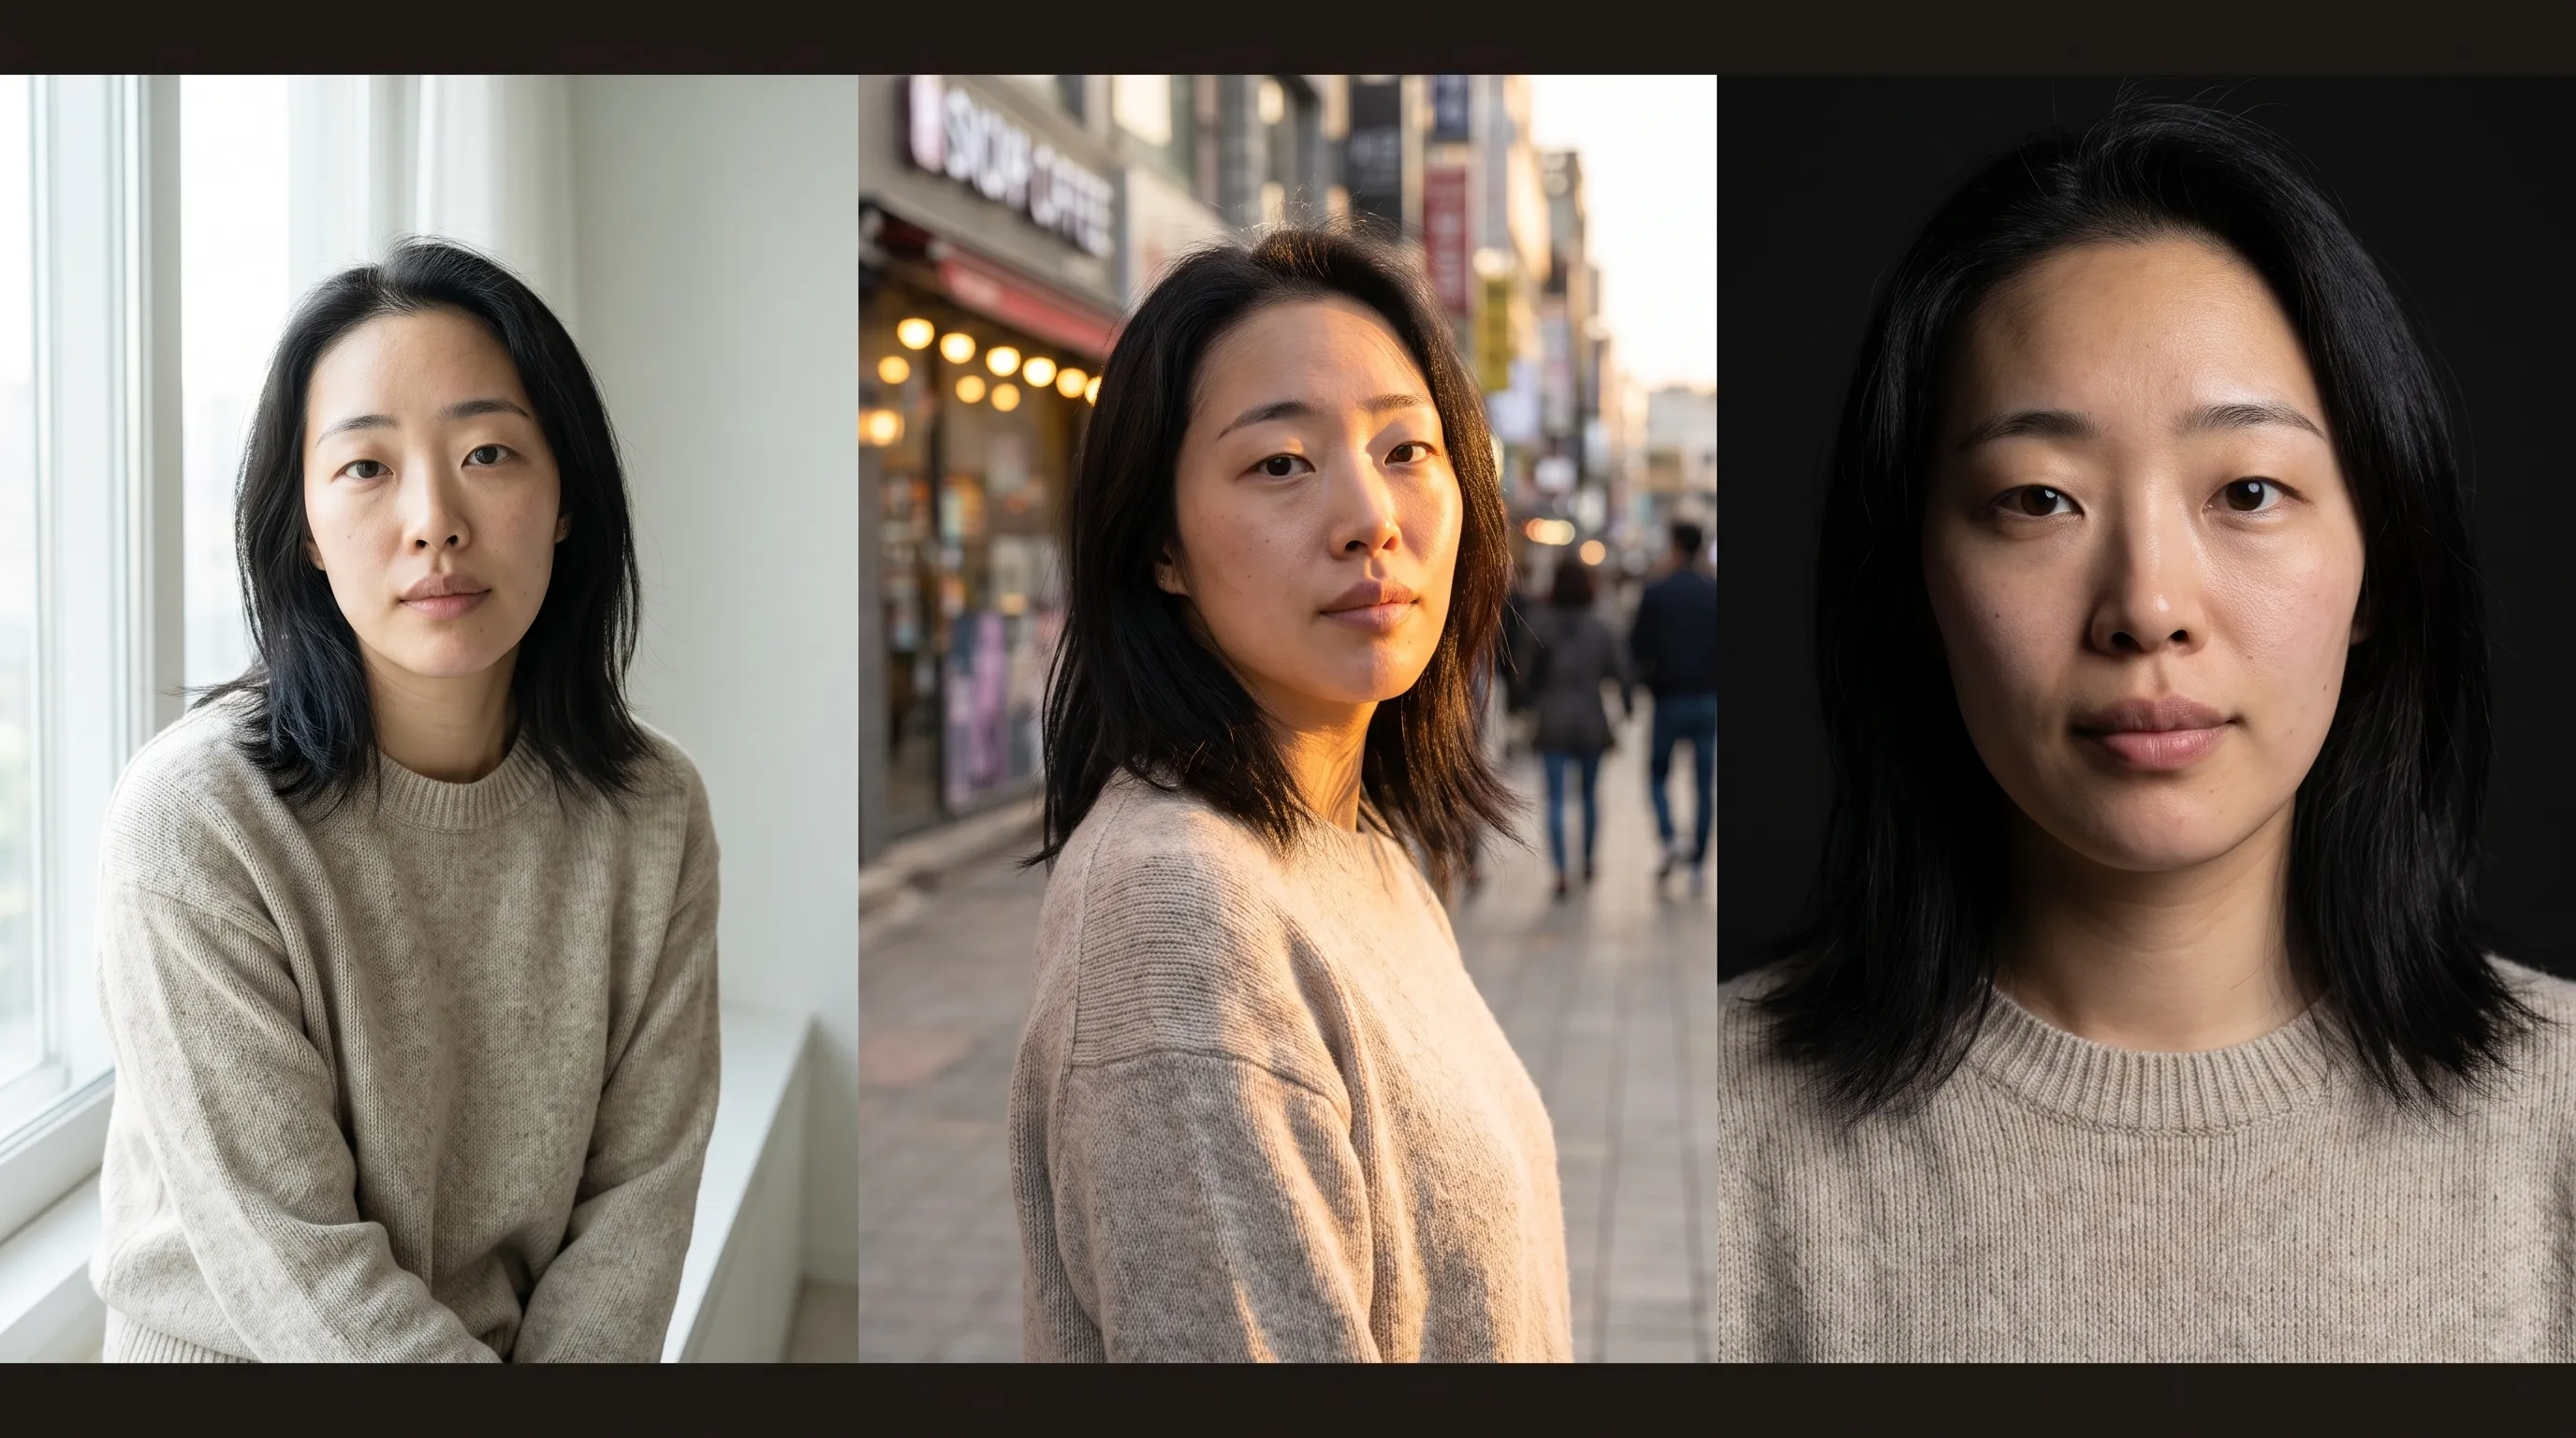
Left is soft window light, wrapping the face with a gentle falloff. Middle is golden hour on a street, low sun raking across the cheekbone. Right is a dark studio backdrop with a single hard key, the far side of the face dropped into shadow.
Write the light together with the place. "On a street" gets you a street; "low golden-hour side light, shopfront bokeh behind" gets you that frame. Direction, hardness, and colour temperature carry more weight in an AI portrait than the scenery does.
Prompt templates for four common shoots
I built one frame for each of the four setups people ask for most. Copy and adapt:
Corporate headshot — light grey seamless background, even frontal soft light, dark blazer, closed-mouth smile, chest-up framing. Skip environmental detail; the cleaner it is, the more it reads as a real headshot. This is also the AI portrait type that lands first try most often.
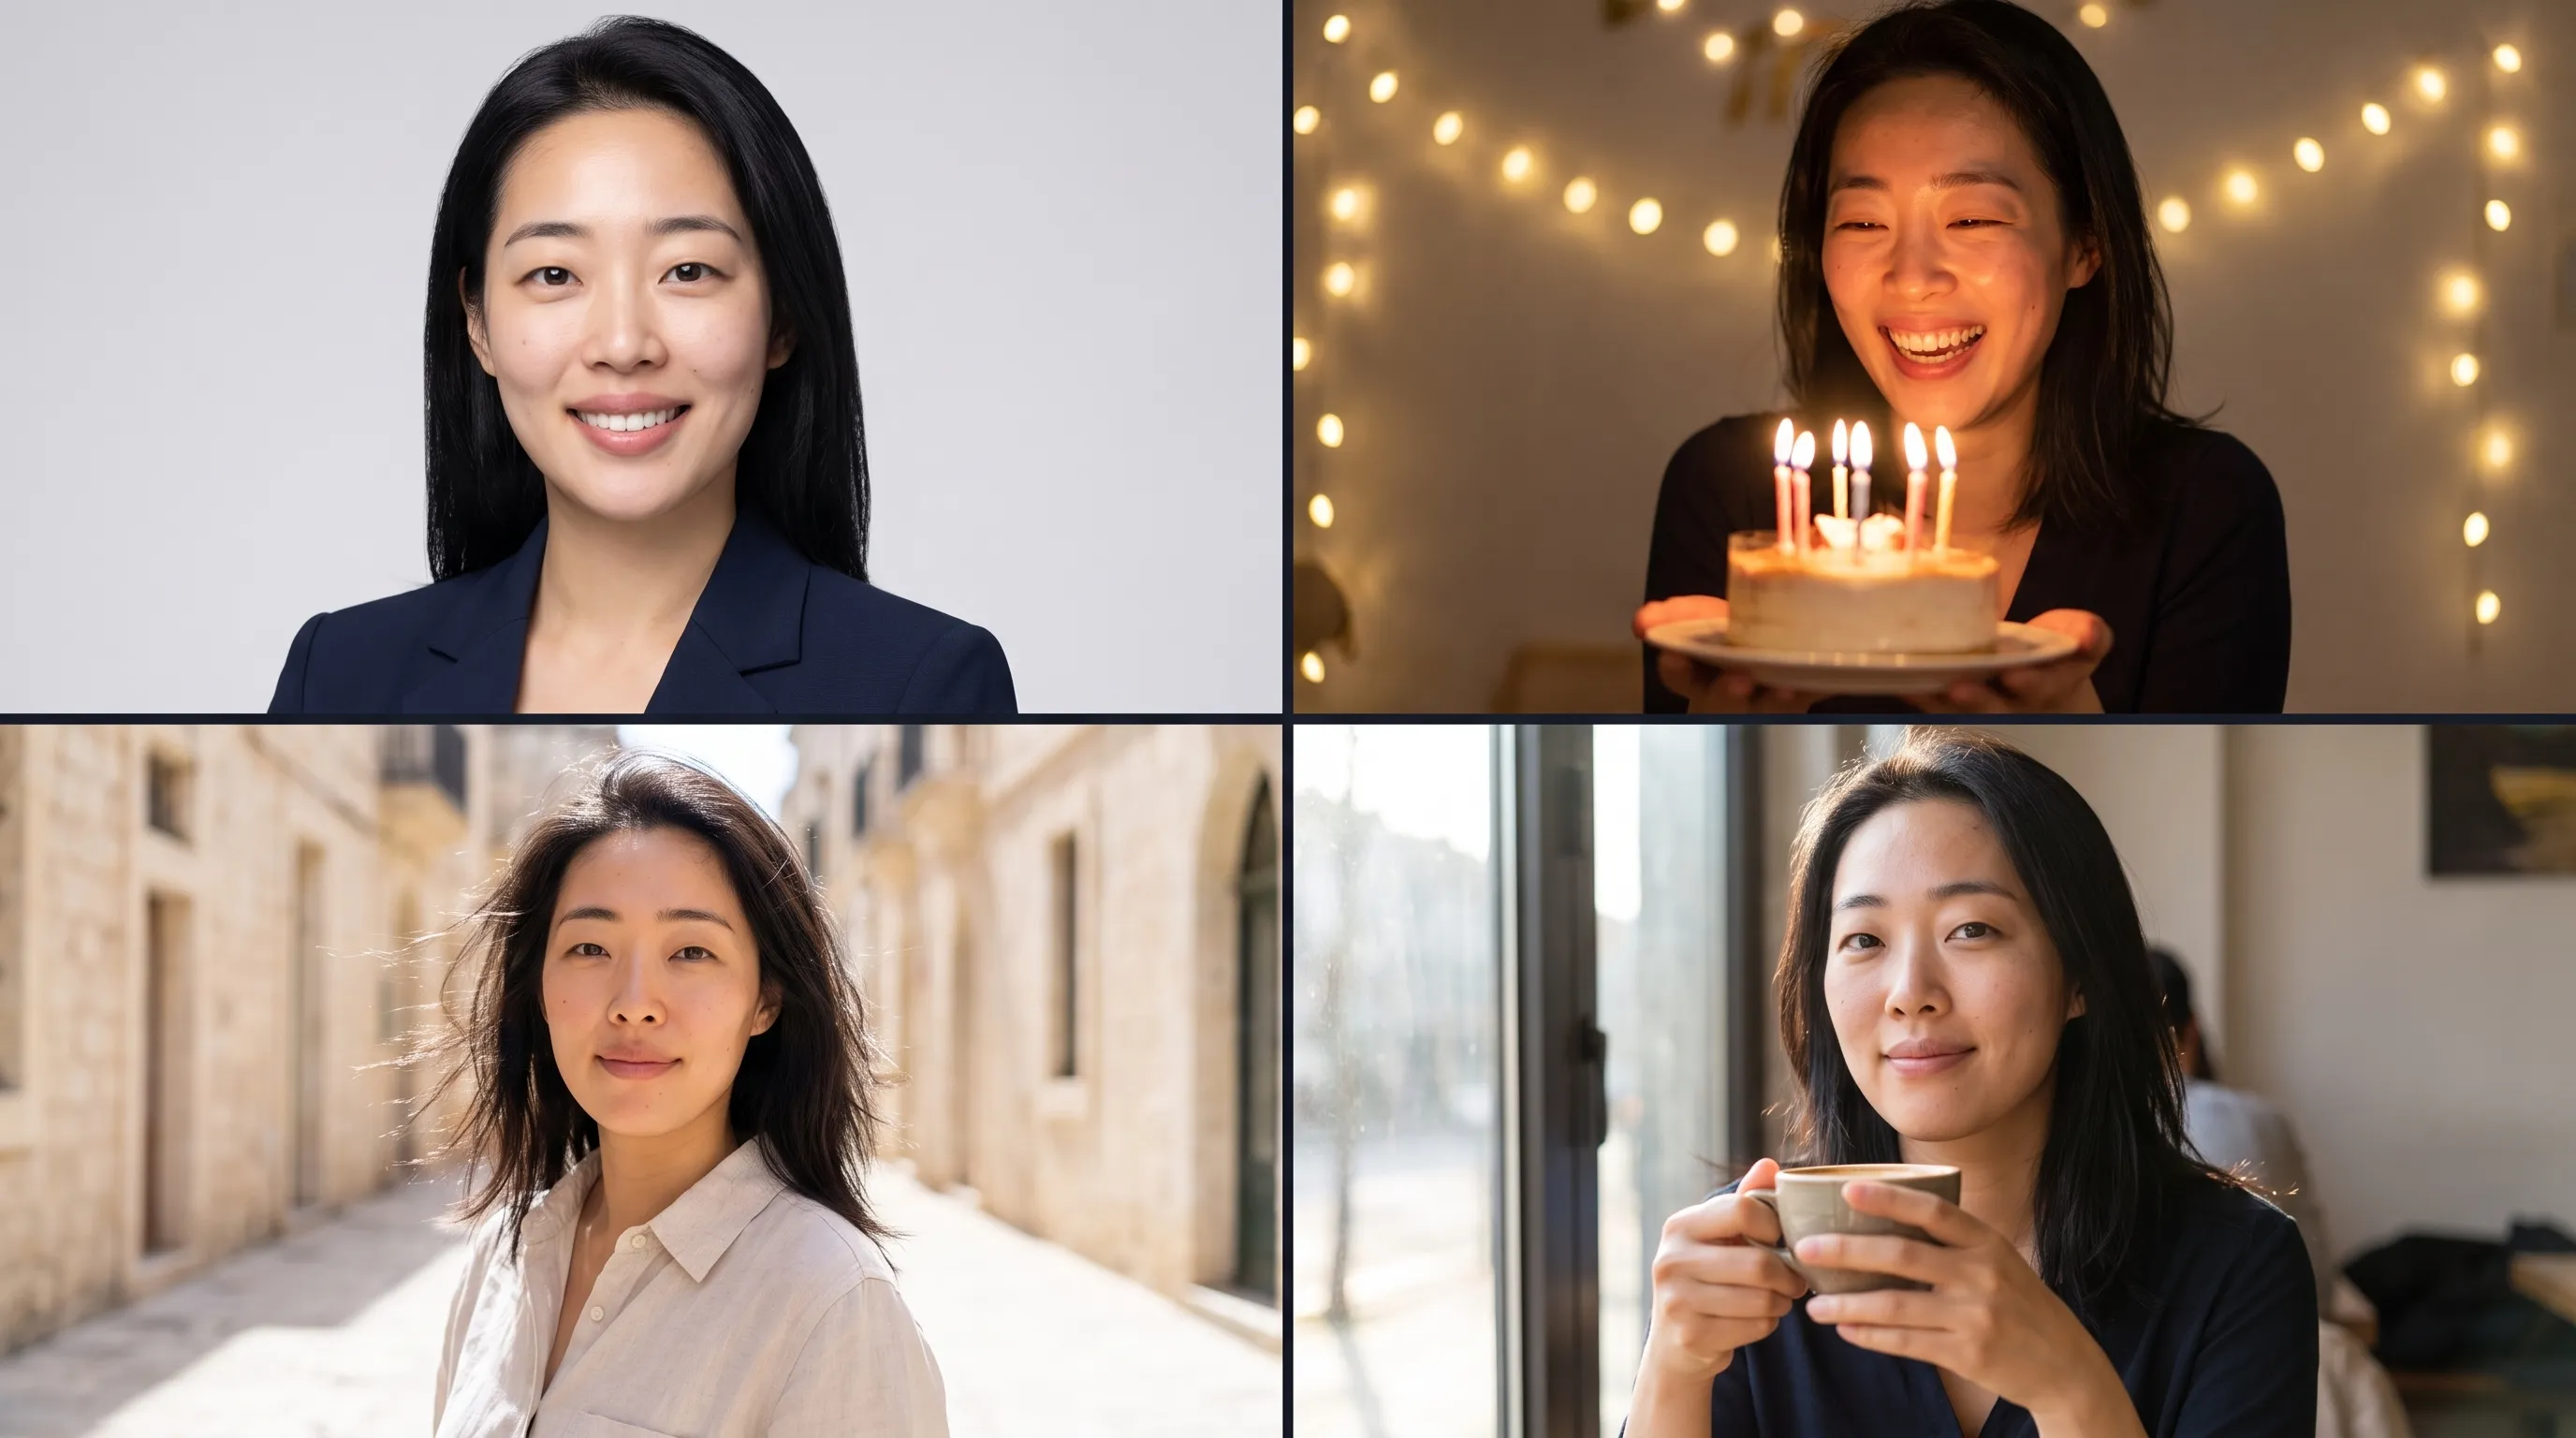
Birthday — warm string lights thrown out of focus behind, a small cake with lit candles in hand, the candles as the key light from below, laughing. Say explicitly that the candles are the main light source, or the whole frame goes flat.
Travel — linen shirt, sunlit stone street, wind in the hair, background buildings slightly blown out. Don't chase perfect skin here; a little roughness reads as real.
Cafe lifestyle — side light from a window, both hands around a cup, cool morning white balance, relaxed three-quarter angle. Don't ask for eye contact; a slightly averted gaze looks less staged.
Couples and maternity work the same way — the first needs both faces in the reference, the second needs posture and clothing spelled out. Whatever kind of AI photoshoot you're building, you're still only changing three things: clothes, light, place.
What breaks: the parts you only see zoomed in
At 100% everything looked fine. At 200% it didn't. Three places do most of the damage:
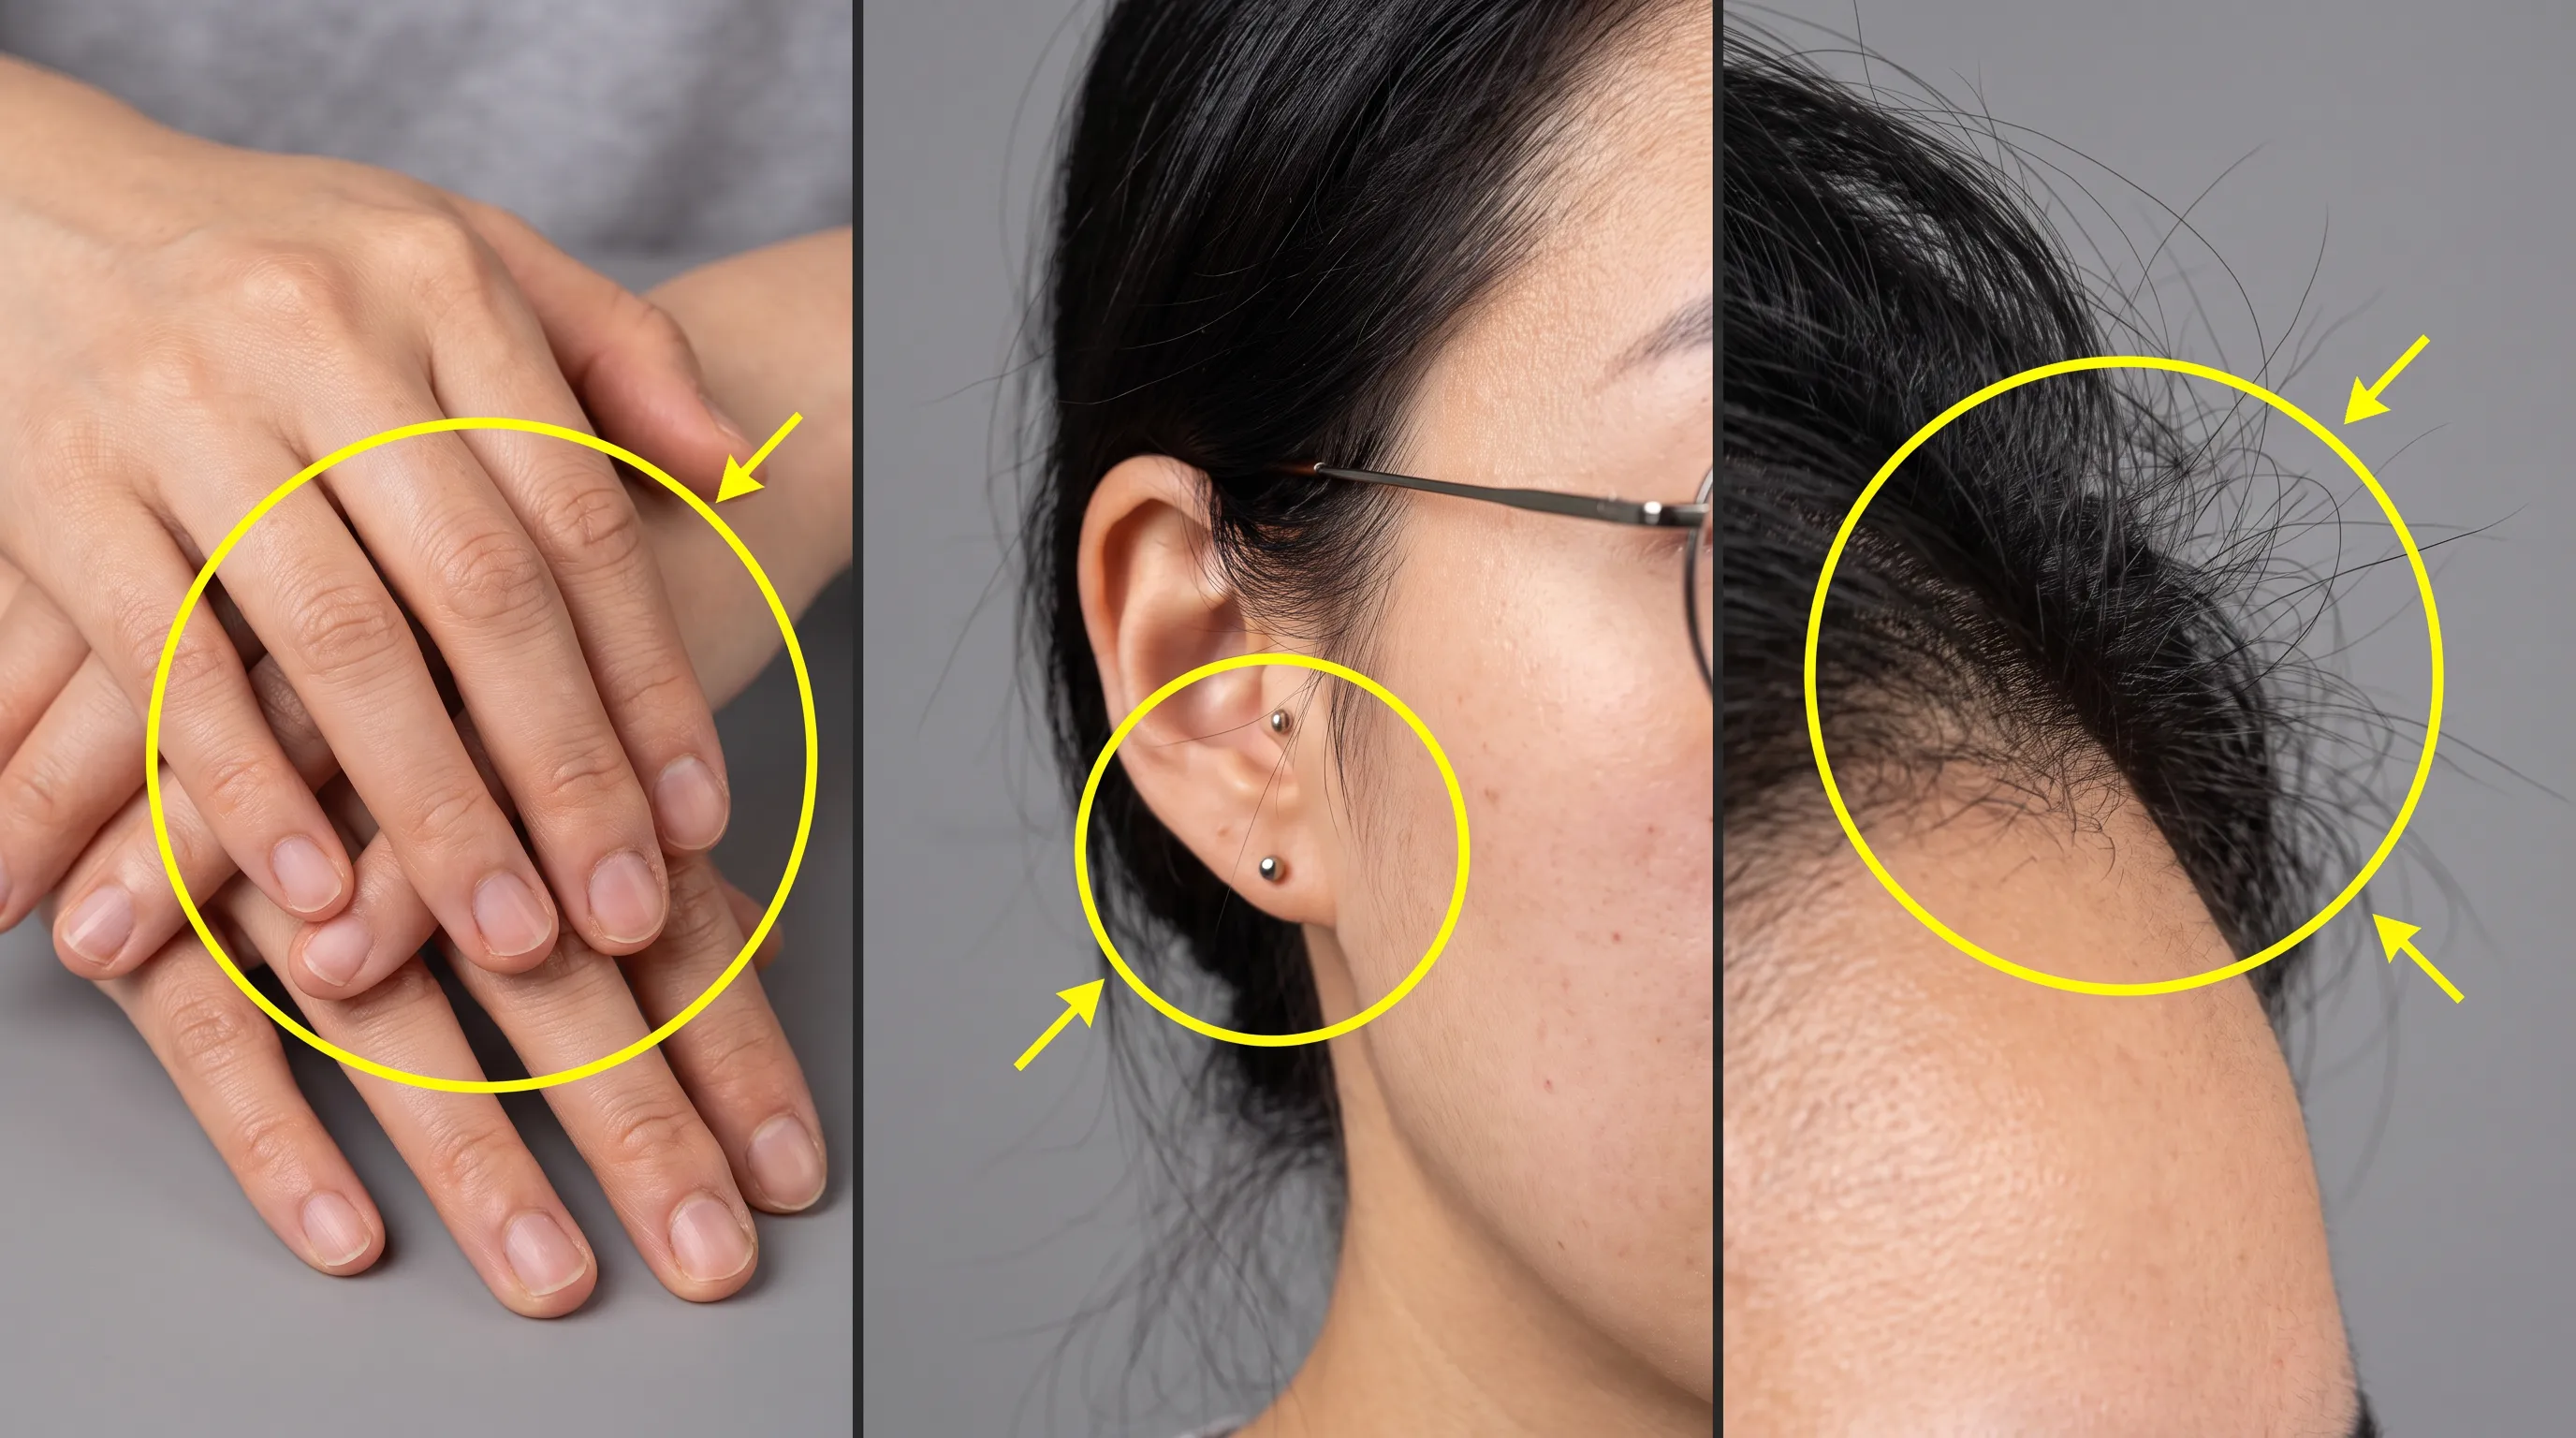
Hands. The left crop is a live example — finger count and knuckle positions pass at a glance, then you notice two fingers have fused. If hands are anywhere in frame, zoom in on them.
Ears, earrings, glasses arms. These three clip through each other constantly: a glasses arm passing through the middle of the ear, a stud growing out of the cartilage, two ears that don't match. If you wear glasses, this is where AI portrait work fails most often.
Hairlines and edges. Where hair meets background you get mush or a hard cut, worst with dark hair on a pale backdrop — the tell that gets an AI portrait spotted fastest.
All three are fixable: mark the region and run one pass of AI image editing, which is cheaper and faster than regenerating the frame. If it's only softness, upscale for detail instead of rerunning anything.
3 of my 15 frames needed local rework — about a one-in-five rework rate. Lower than I expected, but not zero.
Making the shot move
One last step: I sent the final frame to AI video generation and gave it five seconds with MiniMax H3.

Hair lifting in the breeze, one blink, a turn of the head into a smile. On a profile page that outperforms a still. Keep the motion small, though — asking an AI portrait to "stand there and breathe" is far more reliable than asking it to "walk over and wave." The more complex the action, the sooner the face deforms.
The whole checklist
Run it in this order and you won't backtrack:
- Pick the starting selfie — frontal, features unobscured, unsmoothed
- Change outfits first, confirm the face held
- Then hair and makeup, one change per pass
- Location and light last, written as one instruction
- Zoom in on hands, ears and glasses, hairlines
- Fix problem regions locally; upscale anything merely soft
- Pick one frame and animate it
When I'm doing volume, I lay every version of a face out side by side on the Generative Canvas — drift is obvious in a row and easy to miss one image at a time.
The whole thing took about two hours, most of it spent writing prompts and choosing frames rather than waiting on generation. For headshots and social material, an AI photoshoot is already good enough. For commercial work a client is paying for, I'm still hiring a photographer. If you want to try the process yourself, AI image generation is the place to start — one selfie is all the input you need.